


When it comes to roofing, choosing the right materials is crucial for both beauty and durability. Blue 3-tab shingles are a popular choice for homeowners looking to enhance their property's curb appeal while ensuring long-lasting protection against the elements. In this guide, we'll walk you through the installation process of blue 3-tab shingles, making sure you have all the information you need for a successful project.
Learn about Blue 3 Tab Shingles
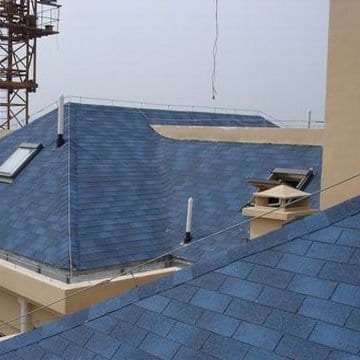
Blue 3-tab shingles are designed to mimic the look of a traditional roof while providing superior performance. These shingles are lightweight, easy to install, and come in a variety of blue shades, allowing homeowners to find the perfect match for their home's exterior. Our company has an annual production capacity of 30,000,000 square meters, ensuring a stable supply of high-quality shingles to meet your roofing needs.
Step-by-step installation guide
Step 1: Prepare the Roof
Before installing shingles, make sure your roof is clean and free of debris. Remove any old roofing material and inspect the shingles for damage. If you find any issues, fix them before continuing.
Step 2: Install Underlayment
Lay down a layer of roof underlayment to provide an additional moisture barrier. Start at the bottom edge of the roof and work your way up, overlapping each row by at least 4 inches. Secure the underlayment with roofing nails.
Step 3: Measure and Mark
Using a tape measure and a chalk line, mark a straight line along the eaves of your roof. This will serve as a guide for the first row of shingles.
Step 4: Install the first line
Begin installing the first row of harbor blue 3 tab shingles along the marked lines. Make sure the shingles are aligned correctly and that they extend past the edge of the roof about 1/4 inch. Secure each shingle with roofing nails and place it in the designated nail slots.
Step 5: Continue with the installation line
Continue installing subsequent rows of shingles, staggering the seams to add strength and visual appeal. Each new row should overlap the previous row by approximately 5 inches. Use a utility knife to cut shingles as needed to fit around vents, chimneys, or other obstructions.
Step 6: Complete the Roof
Once you reach the highest point of the roof, install the final row of shingles. You may need to cut the shingles to fit. Make sure all shingles are securely fastened and there are no exposed nails.
Final touches
After installation, check your work to make sure everything is secure and aligned correctly. Clean up all debris and dispose of old materials responsibly.
in conclusion
Installing blue 3-tab shingles can significantly enhance the appearance and durability of your home. The company has a monthly supply capacity of 300,000 square meters and an annual production capacity of 50 million square meters of metal stone roof, and is committed to providing high-quality roofing solutions. Whether you're a DIY enthusiast or hire a professional, following this guide will help you create a beautiful and functional roof that will stand the test of time.
For more information about our products and services or to place an order, please contact us today! Your dream roof is just steps away.
Post time: Oct-24-2024


